
Master Handmade Techniques for Bird Art
- Nicky

- Sep 8, 2025
- 4 min read
Creating bird art by hand is a wonderful way to connect with nature and express your creativity. Whether you’re a beginner or have some experience, mastering handmade bird art techniques can bring your work to life with charm and personality. I’m excited to share some warm, easy-to-follow tips and ideas that will help you craft beautiful bird-themed art pieces. Let’s dive in and explore how you can bring birds to life on your canvas or paper!
Discovering Handmade Bird Art Techniques
When it comes to handmade bird art, the key is to blend observation with creativity. Birds are full of life, color, and movement, and capturing these qualities requires a few thoughtful techniques.
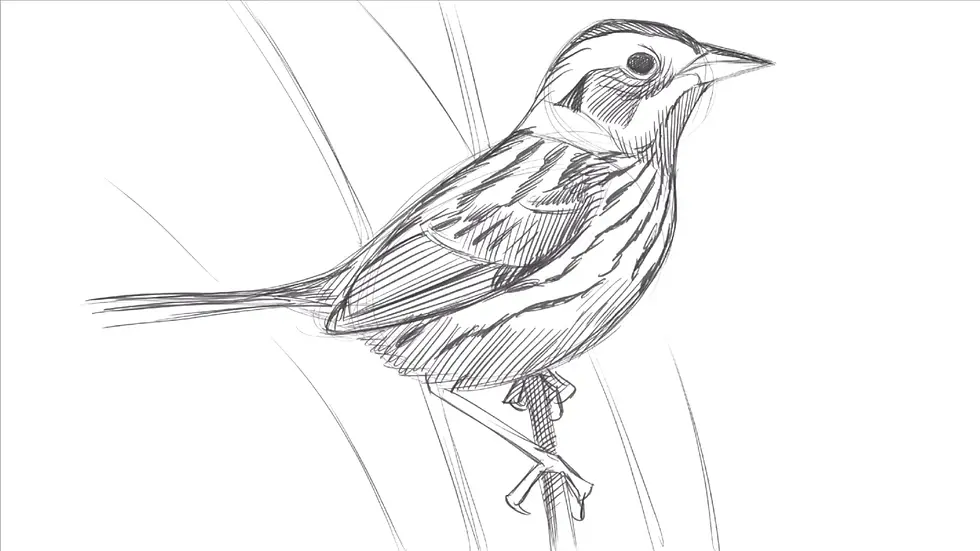
Start with Simple Sketching
Begin by sketching your bird lightly with a pencil. Focus on the basic shapes - ovals for the body, circles for the head, and simple lines for the beak and tail. This helps you get the proportions right without feeling overwhelmed.
Use reference photos or watch birds in your backyard to understand their posture.
Don’t worry about details at this stage; just capture the overall shape.
Practice sketching different bird species to get comfortable with various forms.
Add Texture and Details
Once your sketch feels right, start adding texture to mimic feathers. You can do this by:
Using short, quick strokes for fluffy feathers.
Drawing longer, smoother lines for wing feathers.
Layering pencil or ink to create depth and shadow.
This step brings your bird to life and adds realism without needing to be a professional artist.
Experiment with Color
Color is where your bird art really shines! Whether you use watercolors, colored pencils, or acrylics, here are some tips:
Start with light washes of color and build up gradually.
Mix colors to match the bird’s natural hues, but don’t be afraid to add your own artistic flair.
Use contrasting colors for the background to make your bird pop.
Essential Handmade Bird Art Techniques to Try
Now that you have the basics, let’s explore some specific techniques that can elevate your bird art.
Watercolor Washes for Soft Effects
Watercolors are perfect for capturing the delicate nature of birds. Use a wet-on-wet technique to create soft edges and gentle color blends. This works especially well for feathers and backgrounds.
Wet your paper first, then drop in colors.
Let the colors flow naturally for a dreamy effect.
Add details with a dry brush once the paper is dry.
Ink and Pen for Fine Lines
If you love crisp, detailed work, try using ink pens. This technique is great for outlining feathers, beaks, and eyes.
Use fine liners or dip pens for varied line thickness.
Combine ink with watercolor for a mixed-media look.
Practice cross-hatching to add shadows and texture.
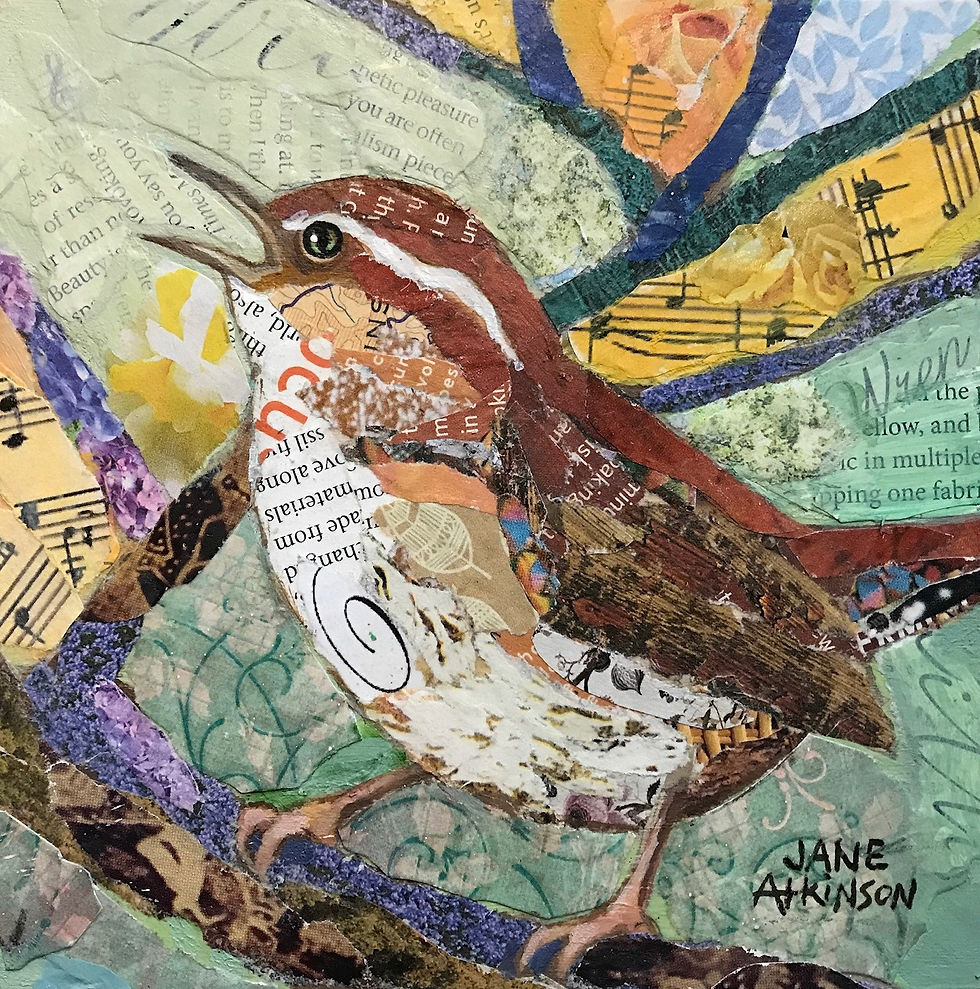
Collage and Mixed Media
For a unique twist, incorporate collage elements like textured paper, fabric, or natural materials.
Cut out feather shapes from patterned paper.
Layer different materials to add dimension.
Use glue sparingly to keep your piece neat.
This approach adds a tactile quality that’s fun and engaging.
Tools and Materials That Make a Difference
Having the right tools can make your handmade bird art journey smoother and more enjoyable. Here’s what I recommend:
Sketchbook or quality watercolor paper - Choose paper that suits your medium.
Pencils and erasers - A range of hardness helps with shading and details.
Watercolor paints or colored pencils - Pick vibrant, lightfast colors.
Fine liners and brushes - Different sizes for varied effects.
Palette and water containers - Keep your colors fresh and clean.
Reference books or photos - For inspiration and accuracy.
You can find many of these supplies at your local art store, large retailers, or online.
Tips for Capturing Bird Personality in Your Art
Birds are not just shapes and colors - they have character! Here’s how to bring that personality into your handmade art:
Focus on the eyes - The eyes are the window to the bird’s soul. Make them bright and expressive.
Show movement - Capture a bird in flight or perched with a slight tilt of the head.
Use background elements - Add branches, leaves, or sky to set the scene.
Play with composition - Try different angles and close-ups to find the most engaging view.
Remember, every bird has a story. Your art can tell it beautifully!

Bringing Your Bird Art to Life and Sharing It
Once you’ve created your bird art, think about how to showcase it. Here are some ideas:
Frame your artwork and display it at home or gift it to friends.
Create greeting cards or prints to share your passion.
Join online communities or local art groups to connect with fellow bird art lovers.
Start a blog or social media page to document your progress and inspire others.
Building a connection with your audience can also help you grow your email list if you’re selling your art or products. Sharing your journey makes your work more meaningful and personal.
I hope these handmade bird art techniques inspire you to pick up your tools and start creating. Remember, every artist starts somewhere, and with patience and practice, your bird art will soar! Keep exploring, experimenting, and most importantly, enjoy the process of bringing these beautiful creatures to life on your canvas. Happy creating!

Comments